Configuring Payees for ACH
eZ Payment provides a mechanism to add ACH payment details to QuickBooks vendors, other names, customers and employees since QuickBooks does not have fields for this information.
In order to setup a payee for ACH, you will need the following pieces of information for the vendor:
- Bank Name
- Bank Routing Number
- Bank Account Type
- Bank Account Number
- Vendor Type
- Vendor Contact-Can be department or Vendor itself
The following outlines how to enter this information into eZ Payment so a payee can be sent payments via ACH.
Configuring Payees for ACH
Step 1: Launch eZ Payment from your desktop.

Launch eZ Payment Shortcut
Step 2: Select the Bank account you want to configure Payees.
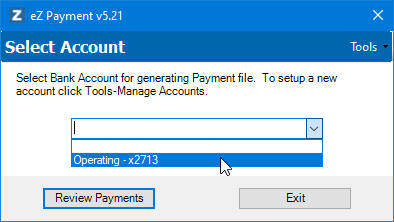
Setup QuickBooks Online Edition Connection window
Step 3: Under the Tools Menu select the Manage Payees option.
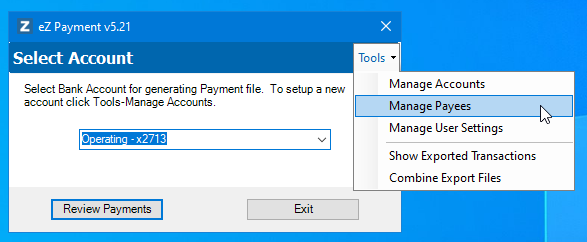
Setup QuickBooks Online Edition Connection window
Step 4: The Payee Setup window will be displayed with all payees in QuickBooks.

Setup Payee List window
Step 5: Find the payee you want to configure and select ‘Yes’ for enable inclusion in ACH file generation and enter ACH payment Information (Bank Name, Routing Number, Vendor Type, Account Type, Account Number and Contact are required).
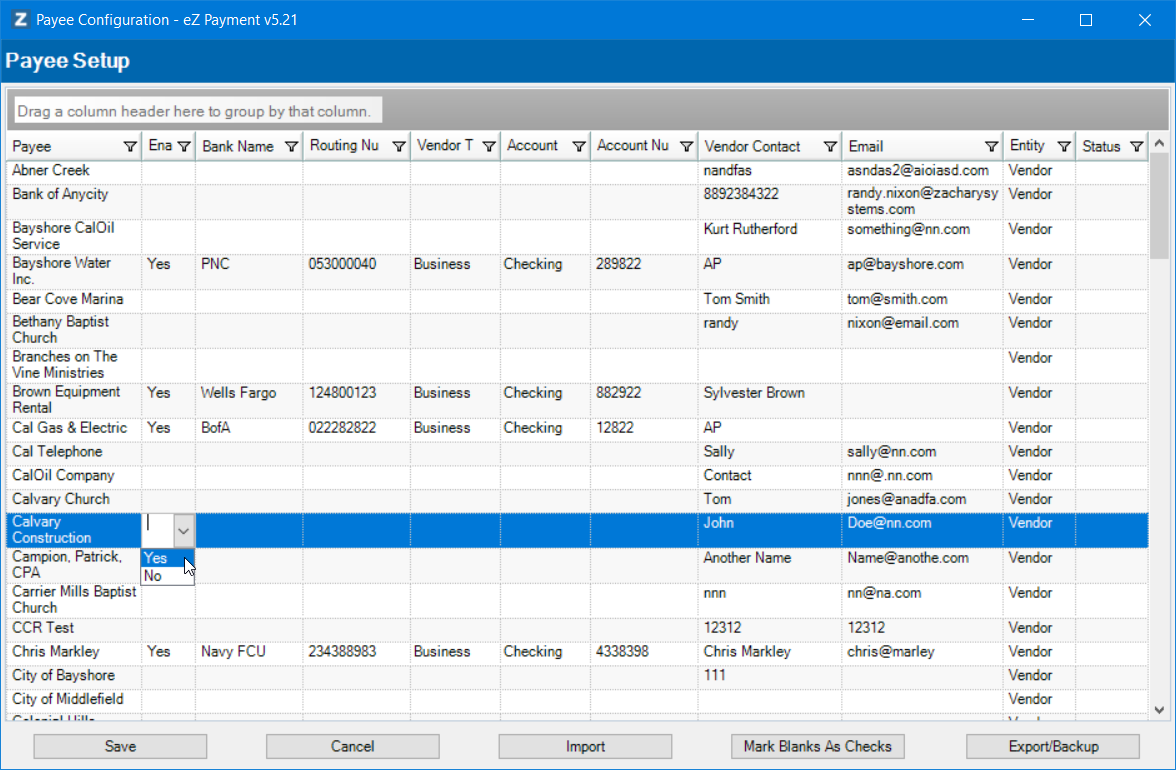
Enable Payee for ACH payment
Step 6: When you the leave a row for a Payee you will be prompted to confirm any changes in the bank routing number or bank account.
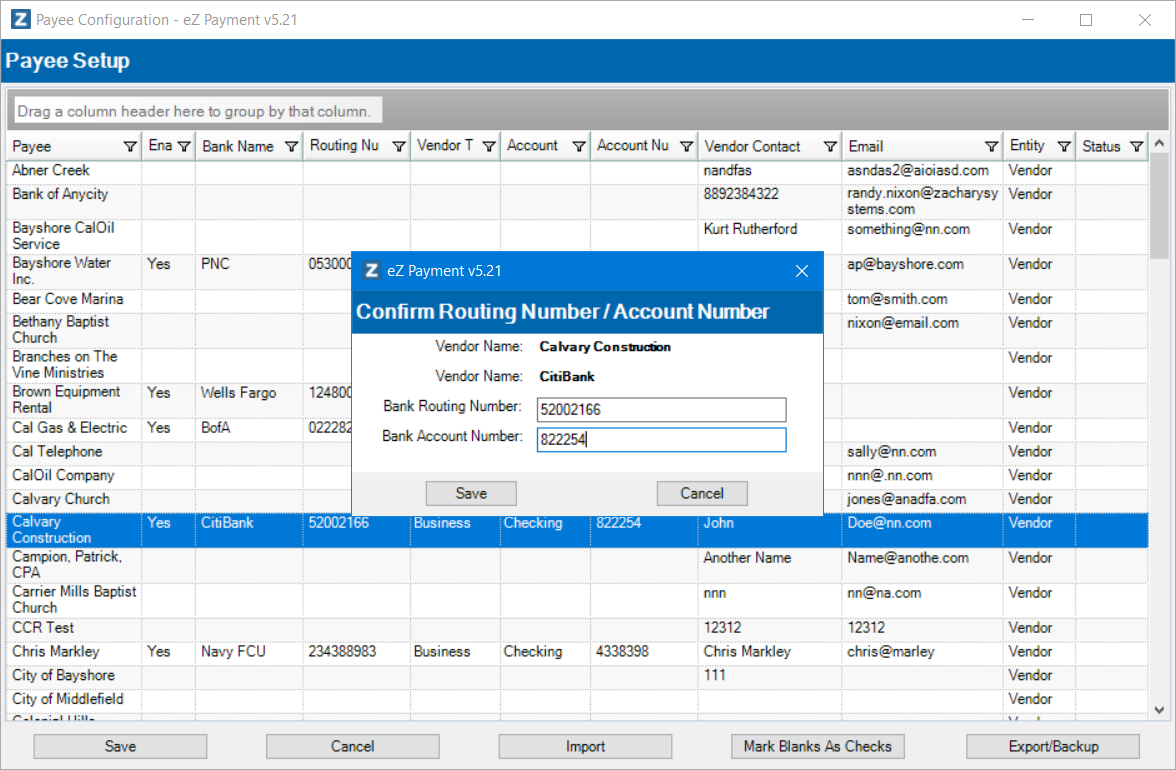
Confirm Payee Bank Information window
Step 7: Continue with any additional Payees.
Step 8: Click Save button to save changes.
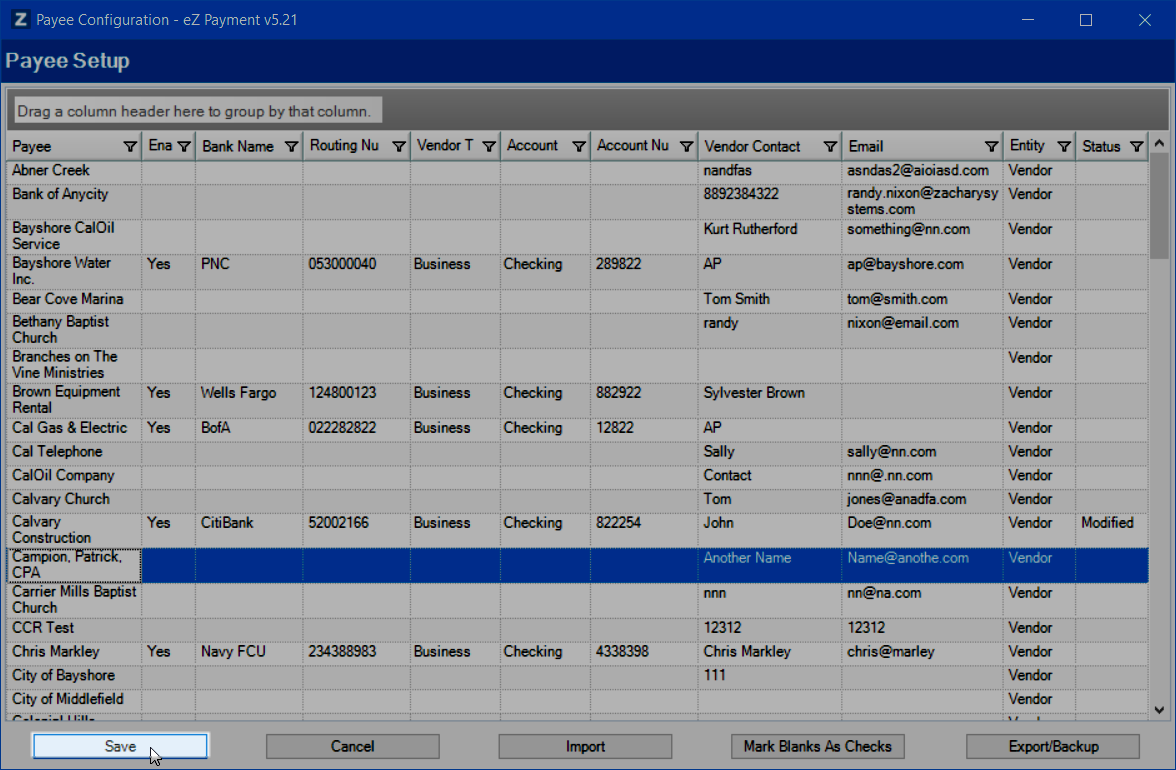
Save Payee Config Changes