Add Vendors or Customers
Adding a vendor or customer allows you to create additional customers and vendors in QuickBooks. In addition to creating a new vendor or customer in eZ Account Import, you can also create an Alias for the vendor or customer at the same time. Aliases let you create easy and recognizable names commonly used by your company. When an Alias is found when eZ Account Import reads an online banking export file, a pre-defined payee and account is automatically pre-populated in the Import Transactions window.
By creating aliases, you are not required to have a one for one match between online transactions and vendors & customers within your accounting software. It also eliminates the issue when vendors add transaction identifiers, such as store number or date, to transactions.
To create a new Customer/Vendor in eZ Credit Card Import :
Step 1: Launch eZ Credit Card Import. The Select Import File window opens. Choose the file you want to import and the QuickBooks bank account you want to import into. Click the Review Transactions button.

Select Import File window
Step 2: The Import Transactions window opens with the all the transactions ready for import from the file.
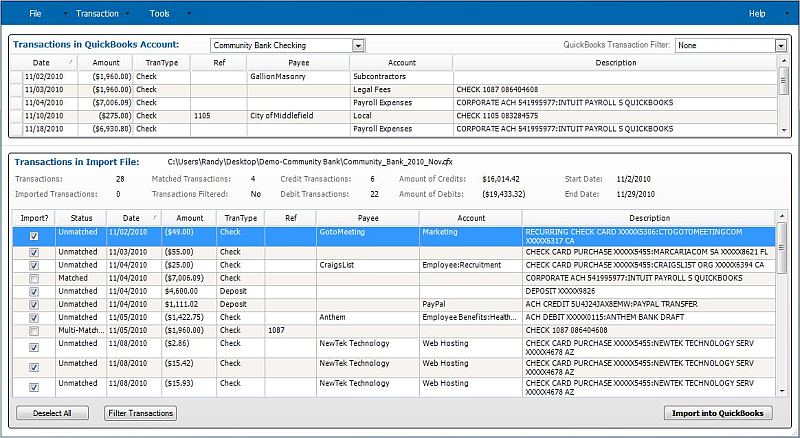
Import Transactions Window
Step 3: Select/highlight the transaction in the Transactions in Import File table that you want to create a Vendor or Customer for. In the top menu, click on Tools and select Add Vendor/Customer. A pop-up menu displays:
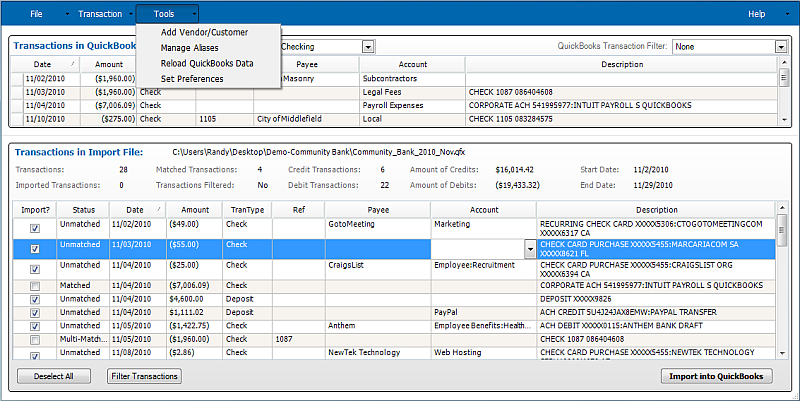
Add Vendor/Customer menu option
Step 4: The Add Vendor or Customer window opens.
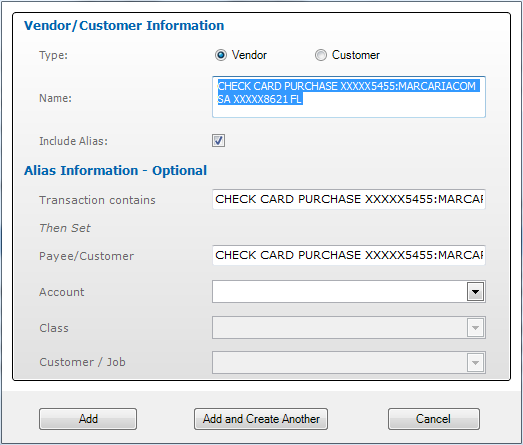
Add Vendor/Customer Window
Step 5: The window will be populated by details contained in the Transactions in Import File table selected. Select the Type of information being entered: Vendor or Customer. Edit the name to your preferred name for the vendor/customer.

Add Vendor/Customer Window (Editing Vendor Name)
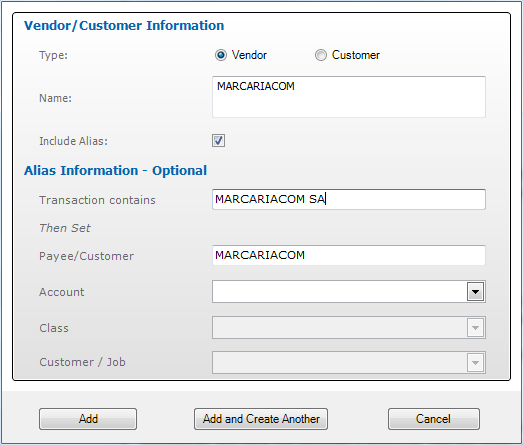
Step 6: Edit the Transactions contains field to the specify keywords for the vendor.
Add Vendor/Customer (Edit Alias Keyword)
Step 7: From the Account drop-down field, select the account the transaction should be placed against:
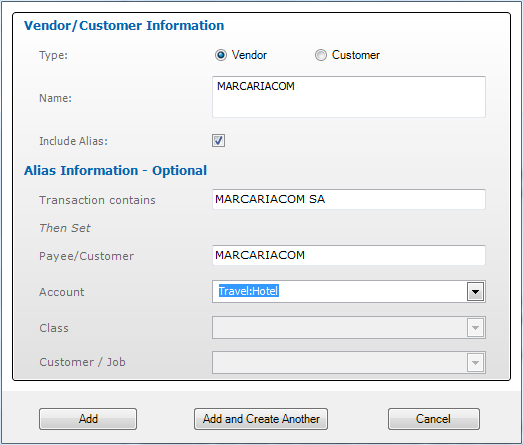
Add Vendor/Customer window (Set Account)
Step 8: Once satisfied with the set-up of the new Vendor or Customer, click the Add button.
Step 9: If you would like to create another Vendor or Customer, click Add and Create Another button.