Import Bill Payments
Step 1: Select the transaction with a negative amount.
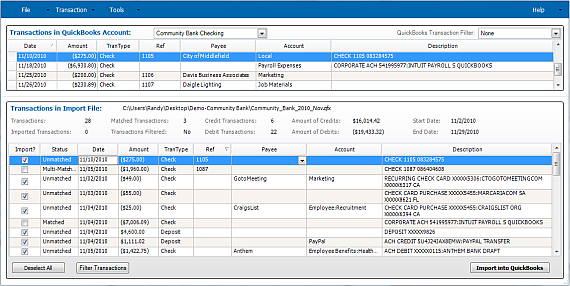
Import Transactions Window
Step 2: Select a Payee from the drop down menu to the vendor with outstanding bill.

Import Transactions window
Step 3: Right-click on the transaction and select Assign Bill from the context menu.
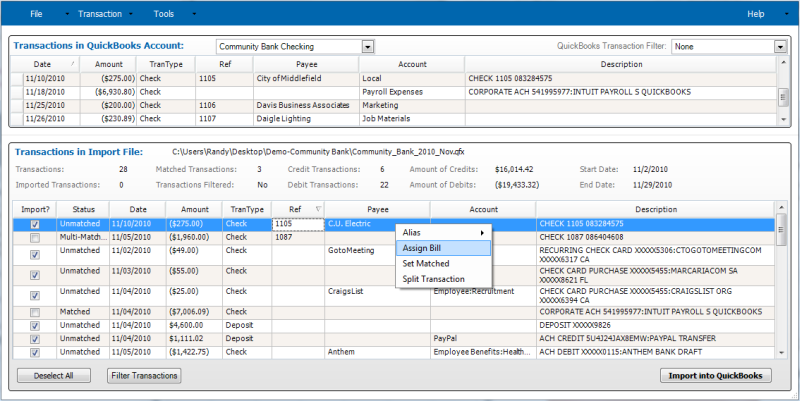
Import Transactions Window
Step 4: The Assign Bill to Transaction window opens.
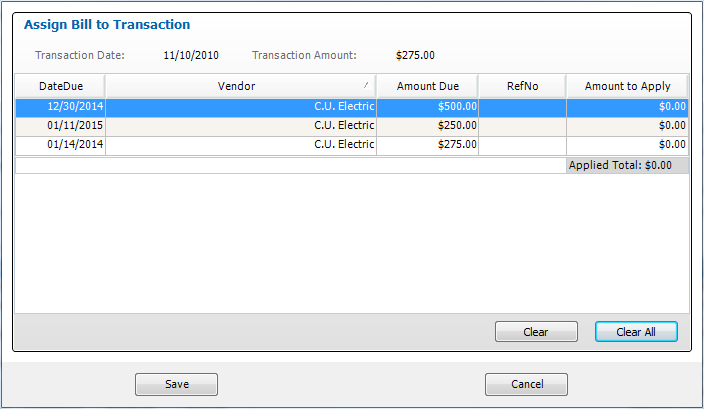
Assign Bill to Transaction Window
Step 5: Apply the total Transaction Amount to one or more bill(s) for a specific Vendor by entering in amounts in the Amount to Apply column. The Applied Total must match the total of the imported Transaction Amount.
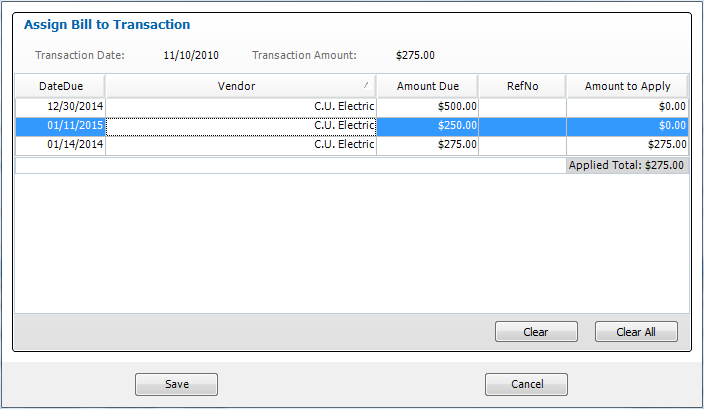
Assign Bill to Transaction window
Step 6: Click the Save button when you’re done. The Transactions in Import File table’s Transaction Type will be set to Payment and the Account column will be marked as Bills Applied.
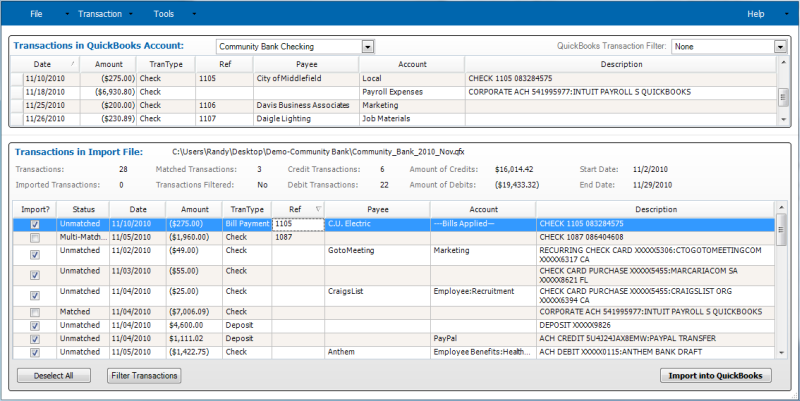
Import Transactions Window
Step 7: When the Import into QuickBooks button is clicked. The transaction will set the bill as paid and debit the bank account the amount of the transaction.